PostgreSQL
Amverum cloud supports the creation of a managed postgres cluster with one or more running DBMS replicas. Creating a cluster takes place in a few simple steps:
Deploying a cluster
On the main page, click on the “Create” button.
Set the “Project Name”, select “Service Type” “PostgreSQL” and the appropriate tariff.
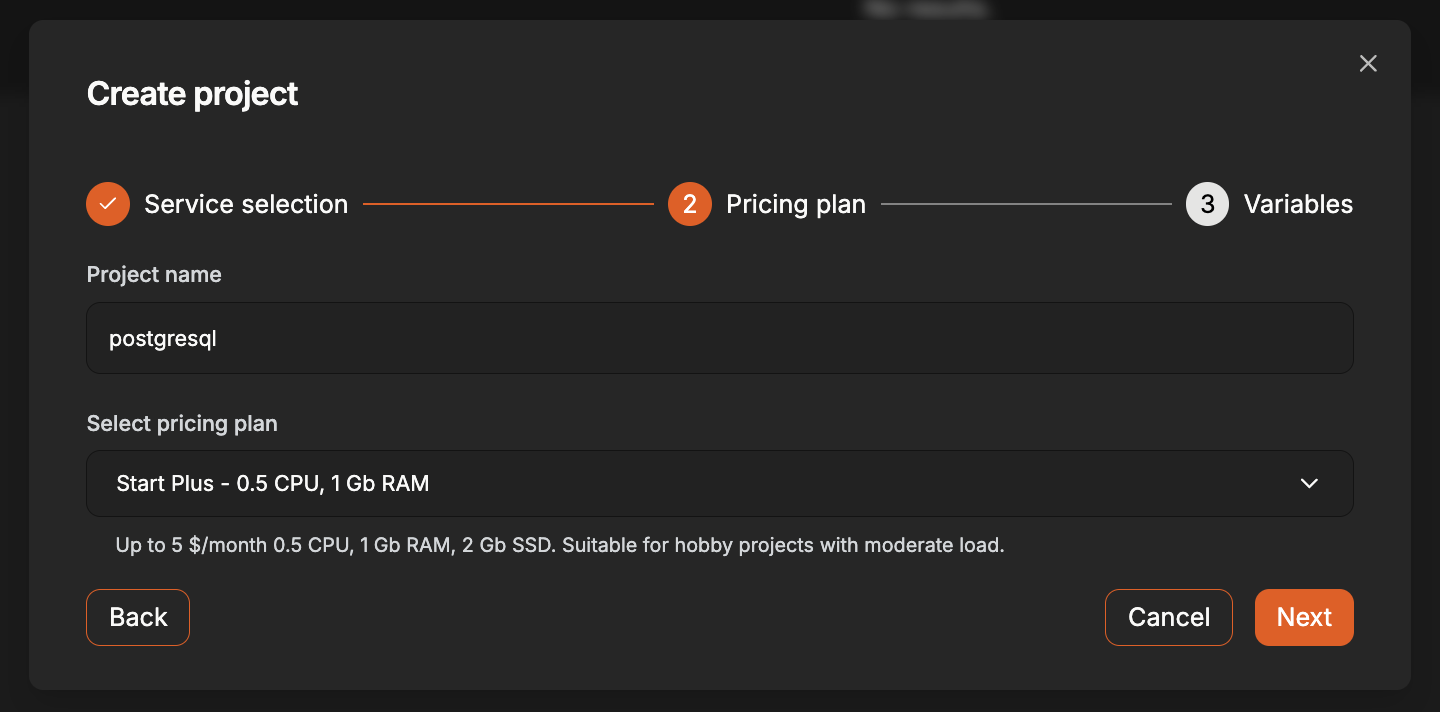
Attention
Stable work is possible at tariffs not lower than “Initial”.
Set PostgreSQL DBMS parameters
Attention
The database name and username postgres are reserved and cannot be specified.
Name of the database being created- the name for the database that will be created in the cluster.User name- the name for the user under which the DBMS will be logged in.User password- password for the above user, under which the DBMS will be logged in.DBMS cluster size- number of DBMS replicas. In this case, one of the replicas will be the master and, due to the peculiarities of the DBMS, write access will be available only through it.Important
Billing occurs separately for each replica according to the selected tariff
Activate Superuser Access- activate superuser access with usernamepostgres.Password for Superuser- password for the userpostgres, under which it is possible to log into the DBMS with superuser rights.
Click the «Finish» button and wait for the cluster to enter the «PostgreSQL running» status.
Connect to the cluster
To access the database from other Amverum projects, just specify one of three domain names:
Read/write:
amverum-<username>-cnpg-<project_name>-rwRead-only in hot standby mode:
amverum-<username>-cnpg-<project_name>-roFor reading from any of the deployed nodes:
amverum-<username>-cnpg-<project_name>-r
To access the database from the Internet, you must create a domain name with type POSTGRES. The client that will connect to the database must support SSL.
In pgAdmin Desktop it is indicated
Host name:
<project_name>-<username>.db-msk0.amverum.techSSL mode:
prefer
1. Create an application with a suitable tariff.
Attention
For pgadmin to work, you need a container with a tariff of at least «Starter».
2. At the “Data Upload” stage, select “Via Git”
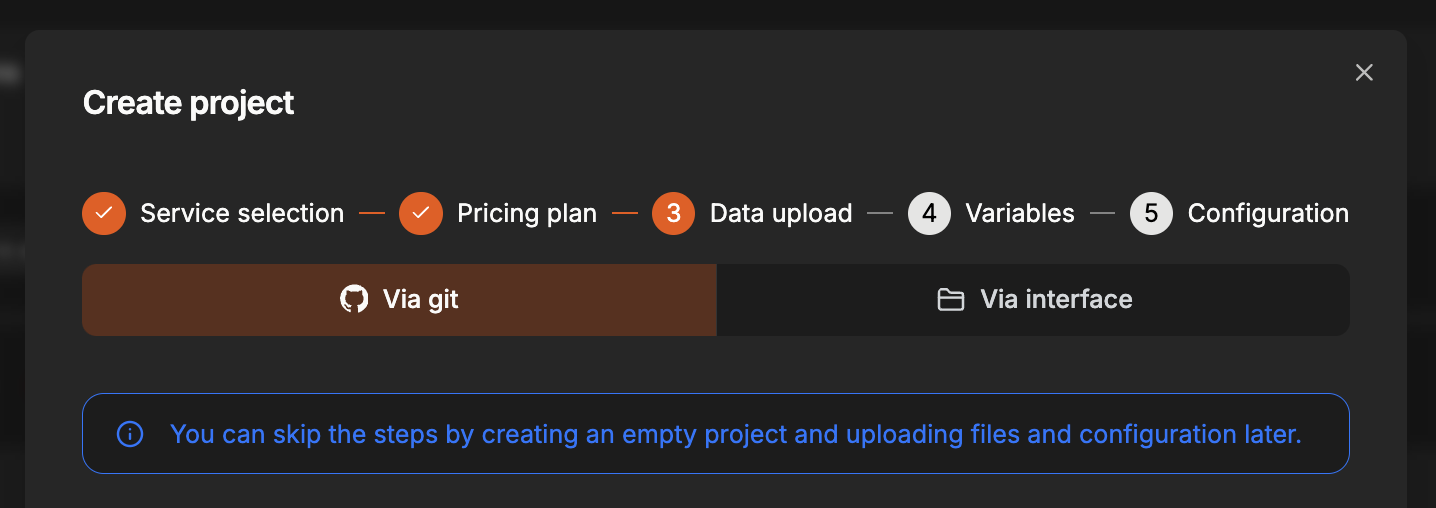
3. At the «Configuration» stage, select «db» and «pgadmin» and click «Finish»
Deployment uses image Docker dpage/pgadmin4:${meta.toolchain.version}
4. Specify the required environment parameters.
In the «Variables» section of the project, you must set the following environment variables:
Variable
PGADMIN_DEFAULT_EMAIL- pgAdmin admin emailSecret
PGADMIN_DEFAULT_PASSWORD- password for accessing pgAdmin (has nothing to do with the database password)
Setting up pgAdmin
In the «Settings» section of the application, activate free domain name or add your own.

Wait for the domain name to be linked and go to it.
Enter your pgAdmin login information.
On the left, right-click Server->Register->Server…
In the window, in the General section, indicate the name for the connected database. In the Connection section we indicate:
Host name/address - internal domain name of the project with postgreSQL. You can find the internal domain name on the «Info» page of the DBMS.
Maintenance database - name of the database (default
postgres)Username - the user name that was specified at the stage of creating the DBMS (if Superuser was activated, it can be either yours or
postgres)Password - password of the above user.
Click the «Save» button
Cunning
To save on project consumption with pgAdmin, we recommend pausing it after finishing work.
Backups
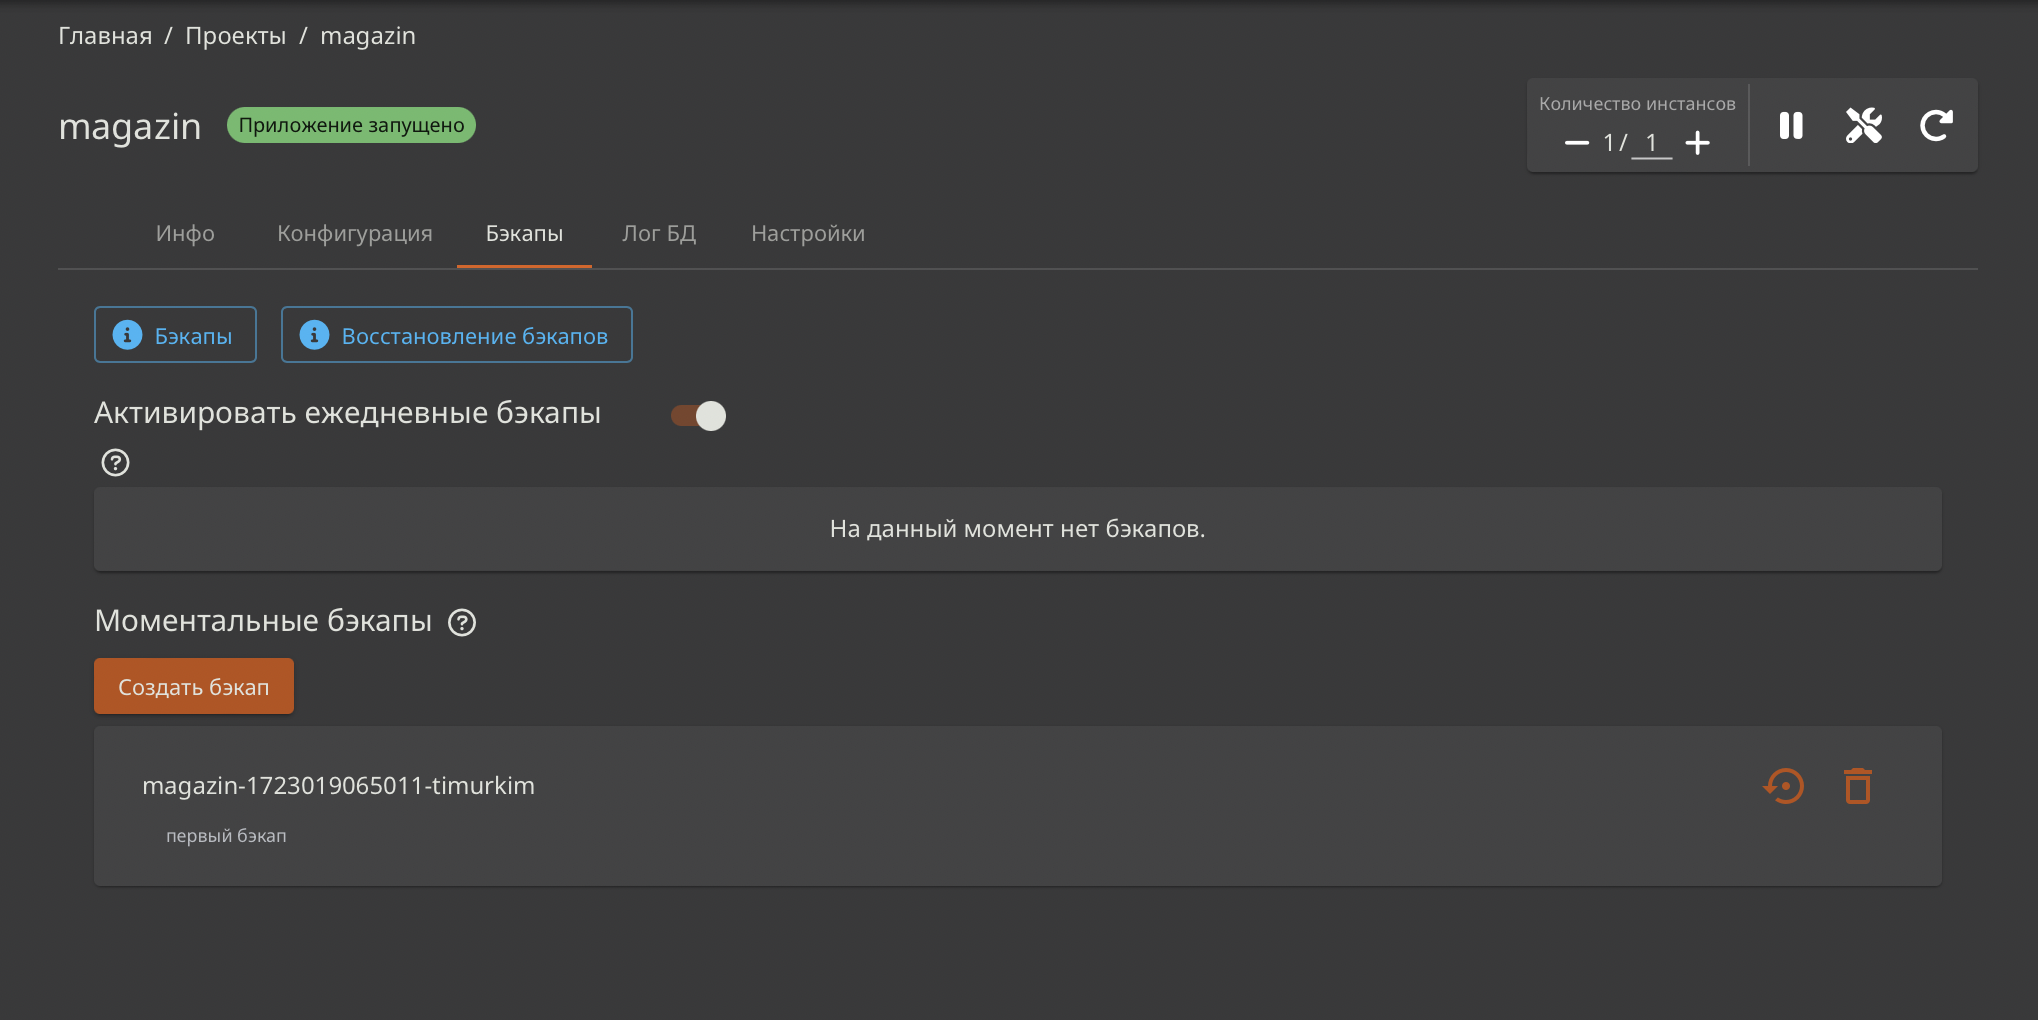
Scheduled backups
The service provides the ability to create free backups on a schedule. Backups will begin to be created the next day at the hour of their activation. The service stores the last three backups.
Important
After stopping the cluster, daily backups will be disabled. Don’t forget to activate them after starting the cluster.
Click-to-click backups
To create a backup, click on the “Create backup” button and enter its description to distinguish it from others. The backup name will be generated automatically.
You can create a maximum of three backups, they are also free.
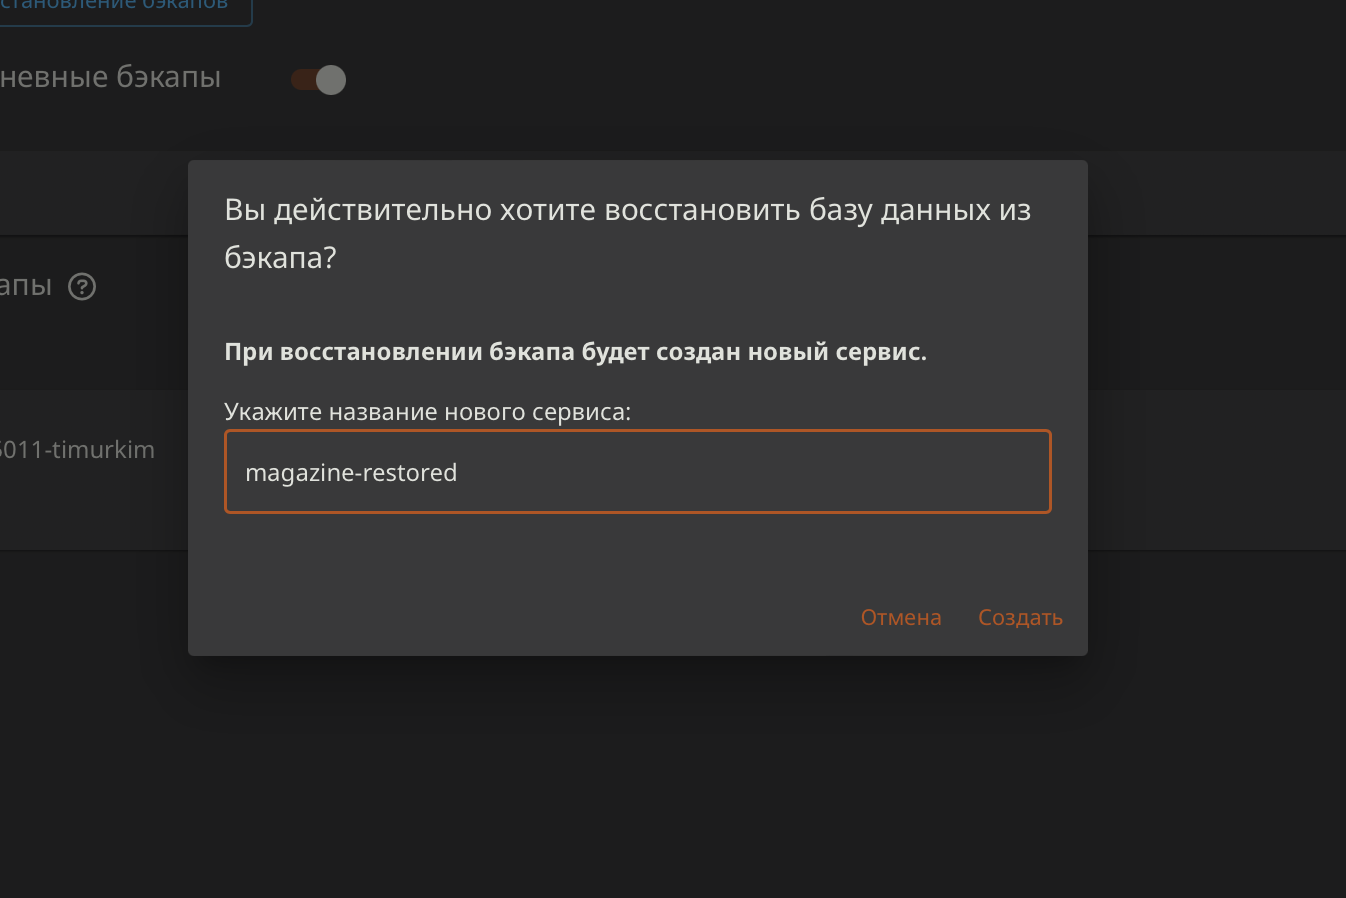
Cluster recovery
Attention
After the cluster is restored, a new service will be created. To connect to the restored cluster, do not forget to change the url in your project. The user and passwords will be restored automatically.
You can restore the cluster by clicking on the icon of the required backup.
To successfully restore a cluster at the time of creating a backup, the following conditions must be met:
Having at least two successful backups
Transactions in the interval between the creation of these backups
For example, there is a backup A. To restore the cluster to the moment when backup A was created, you need to carry out some transactions (creating a table, adding a record, etc.) and create backup B. After successfully creating backup B, you will be able to restore the cluster from backup A.
If you have only one backup or the last backup was selected, the cluster will be restored to its present state, that is, duplicated.
These restrictions are related to the peculiarities of creating backup copies and restoring data in PostgreSQL.
If the recovery takes more than 20 minutes (the time depends on the size of the database), then contact support.