Backend using Flask
The instructions contain a tutorial and a video example of deploying a Flask application.
Planning
Let’s create a simple application in the Python programming language using the Flask framework. This will be the API for TODO notes.
Clue
To get acquainted with the principle of working with git, we recommend this article, which will help you understand how to create a git repository and make changes to it.
Each note will be defined as follows:
{
  "text": "Buy milk",
  "done": true
}
All notes will be stored as an array in a JSON file.
Let’s define the API as follows.
GET /todogets a list of all TODOs.GET /todo/<id>gets a TODO with the given id (index in the array).POST /todoadds a new TODO to the end of the list.PUT /todo/<id>replaces the TODO with the given id.
Implementation
First, let’s write the application itself.
Since our application uses Flask, let’s create a requirements.txt file:
Flask==2.2.2
Flask-CORS==3.0.10
gunicorn==20.1.0
Let’s write the application code running locally in the app.py file:
import json
from flask import Flask, request, abort
from flask_cors import CORS

FILENAME = "todo.json"

def get_data():
    try:
        with open(FILENAME, "r", encoding="utf-8") as f:
            return json.load(f)
    except FileNotFoundError:
        return []

def save_data(data):
    with open(FILENAME, "w", encoding="utf-8") as f:
        json.dump(data, f)

app = Flask(__name__)
cors = CORS(app)

@app.route("/")
def index():
    return "TODO App"

@app.route("/todo")
def get_all_todo():
    return get_data()

@app.route("/todo/<int:id>")
def get_single_todo(id):
    data = get_data()
    if id < 0 or id >= len(data):
        abort(404)
    return data[id]

@app.route("/todo", methods=["POST"])
def add_new_todo():
    new_todo = request.json
    if new_todo is None:
        abort(400)
    data = get_data()
    data.append(new_todo)
    save_data(data)
    return "OK", 201

@app.route("/todo/<int:id>", methods=["PUT"])
def update_todo(id):
    data = get_data()
    if id < 0 or id >= len(data):
        abort(404)
    updated_todo = request.json
    if updated_todo is None:
        abort(400)
    data[id] = updated_todo
    save_data(data)
    return "OK"

if __name__ == "__main__":
    app.run(port=8080)
Let’s install dependencies:
pip install -r requirements.txt
Let’s launch the application:
python app.py
Let’s make sure it works using Postman.
Preparing an application for Amverum
Let’s prepare an application for the Amverum environment. Let’s write amverum.yaml.
You can write a yaml file yourself using the instructions below, or use our yaml generator by following link.
meta:
  environment: python
  toolchain:
    name: pip

run:
  command: gunicorn --bind 0.0.0.0:5000 app:app
  containerPort: 5000
Since we’re using gunicorn to deploy our application, let’s add it to requirements.txt:
Flask==2.2.2
Flask-CORS==3.0.10
gunicorn==20.1.0
It remains to solve the problem with saving the file with TODO in /data.
Let’s add import os to the beginning of the app.py file, and also change the declaration of the FILENAME variable:
FILENAME = "/data/todo.json" if "AMVERUM" in os.environ else "todo.json"
Now the beginning of the app.py file looks like this:
import os
import json
from flask import Flask, request, abort
from flask_cors import CORS

FILENAME = "/data/todo.json" if "AMVERUM" in os.environ else "todo.json"

def get_data():
# ... rest of the file
Initialize the git repository:
git init
Let’s add the files we created to the index:
git add app.py requirements.txt amverum.yml
Let’s commit the changes:
git commit -m "TODO App"
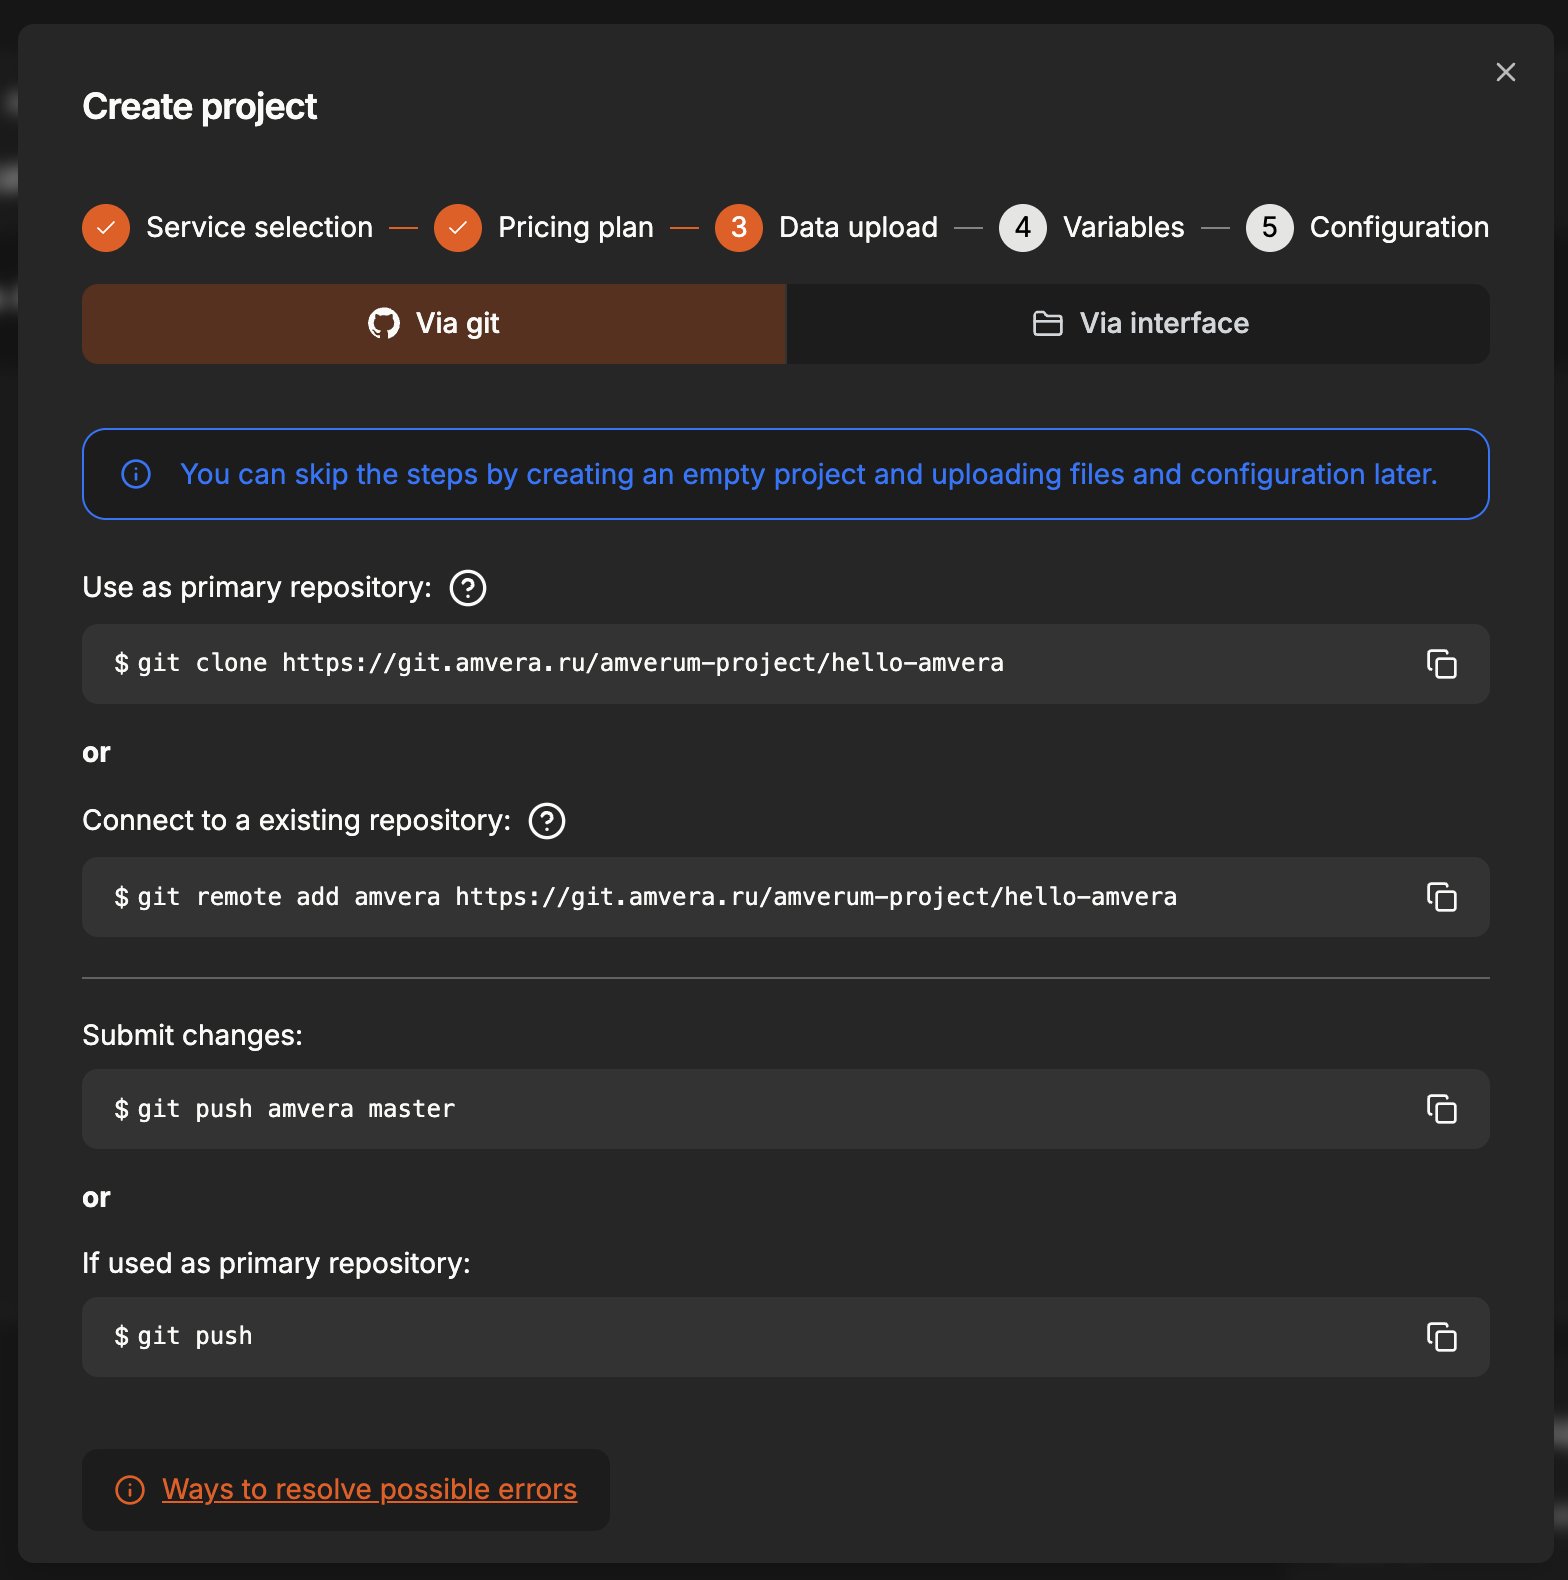
Creating a project in Amverum
Now you need to create an application in Amverum.
In the process of creating an application, we take data for the git repository at the “Data Loading” stage. They can also be found in the tab The «repository» of the application itself.
git remote add amverum https://git.amverum.ru/<username>/todo-app
git push amverum master
After this, the build and deployment application will begin. Wait for the «Deployed Successfully» status to appear.
Functionality check
Let’s use Postman again to send requests.
To check the safety of data after a reboot, restart the service using the button in the interface.
After the restart is complete, we will send a request to Postman to check the availability of TODO notes. If they are, then we did everything right.
If something does not work, we recommend that you read the Build and Application logs.
Clue
If logs are written in print, to display them you need to set the PYTHONUNBUFFERED environment variable to 1.
Important
Save database files and other changeable data to permanent storage to avoid losing them when updating the project when the code folder is “rolled back” to the state of the repository update. The data folder in the project root and the /data directory are different directories.
You can check that the save is going to /data by going to the “data” folder on the “Repository” page.
Important
To avoid the 502 error, change host 127.0.0.1 (or similar localhost) to 0.0.0.0 in your code, and specify in the configuration the port that your application listens to (example - 8080).
Congratulations, you have successfully created your first application in Amverum!
If you are unable to deploy the project
Write the symptoms you observe to support@amverum.ru indicating your username and project name, we will try to help you.